Schlieren

Seeing Air Density
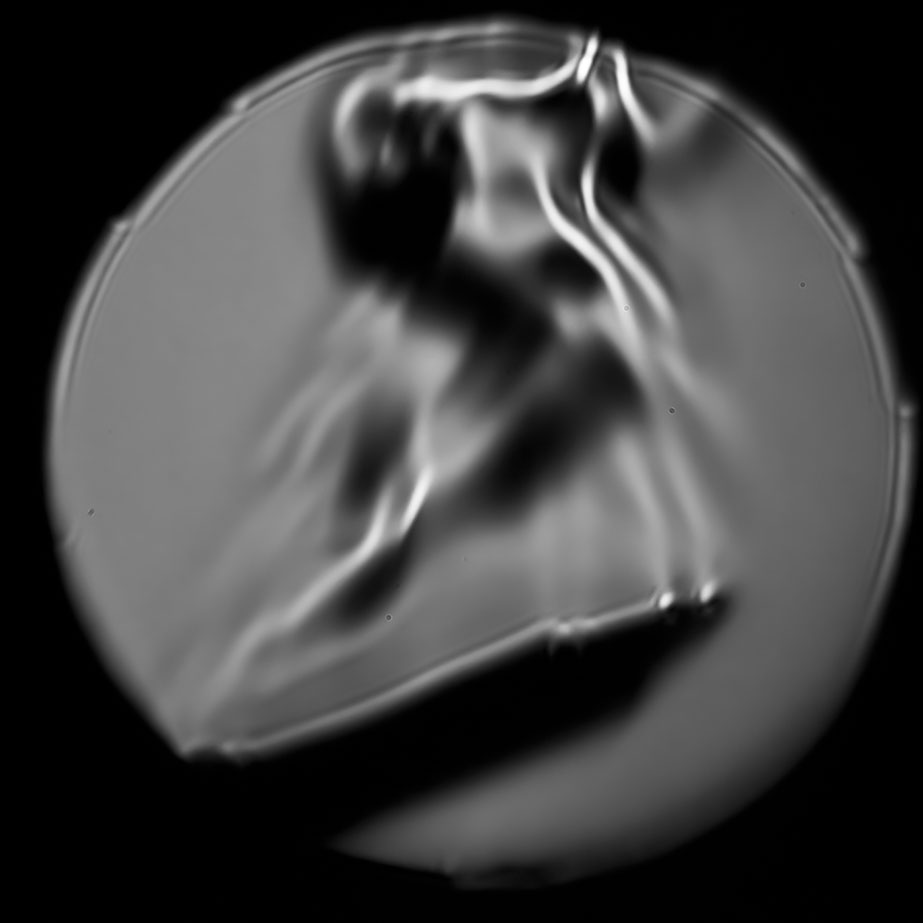
The Schlieren allows you to see density fluctuations in a gas (in this case regular air). These can be caused by pressure or temperature differences.
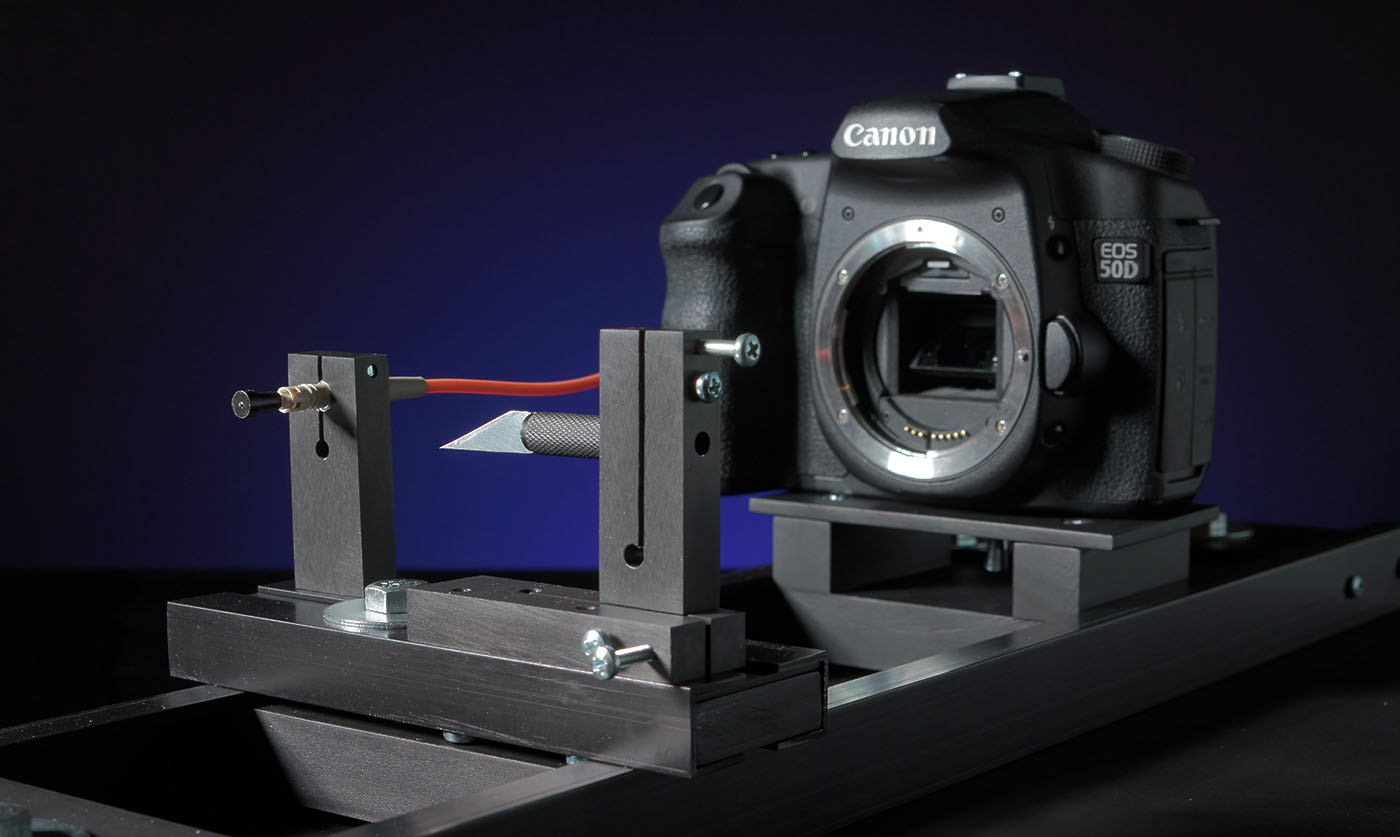
The system works by shining a pinpoint light source onto a parabolic mirror, which then focuses that point down onto the edge of a razor blade, and then into a camera.
When nothing is happening, the light spot is half occluded by the blade, so the camera sees a grey mirror. When something such as warm air is introduced right in front of the mirror, the density difference causes the light to refract and either hit or miss the razor blade. This produces light and dark patterns on the camera sensor.
Supersonic Mach-diamonds

Body Heat

Ice

It's important to note that the patterns visible are not smoke or steam. To the naked eye there was nothing going on.
I was quite happy with the results. It was very exciting to find Mach diamonds forming at the end of my air compressor nozzle. These are due to a standing wave only generated at supersonic speeds (see video above).
One thing I'd still like to fix is the halo/ringing artifacts around object. I'm not sure where they are coming from. My mirror is first surface so I suspect either filters over the camera sensor or artifacts in the light source.
Breath

Non-ignited Butane

Soldering Iron
Hot air gun

Lit Match

Body heat from Hand
Lenses
By putting a lens on the camera, you can capture both normal photos as well as the Schlieren effect. Downside to this is imperfections and dust on the lens show up as large artifacts because the system is so sensitive.

Hot Drink

Body Heat

Soldering Iron

Ice

Ignighted Butane

Hot Air gun

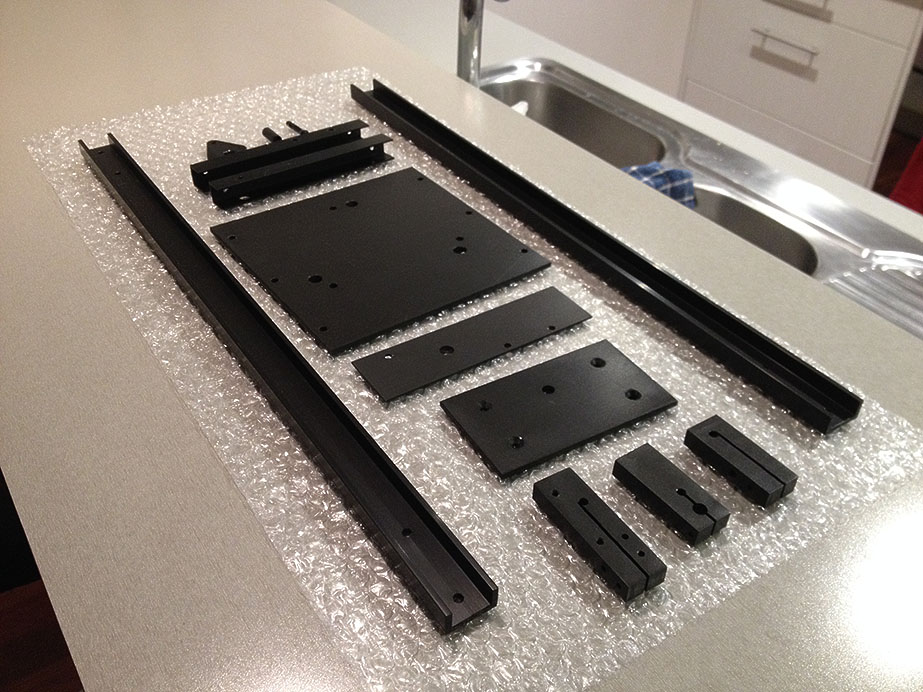
Building
The light source is an LED focused down into a 62.5 micron fiber-optic. This is aimed at a 4.5" parabolic first-surface mirror in an adjustable mount (from a telescope).
One of the challenges with any Schlieren setup is alignment. The light source is very small, and this means the blade must be adjusted very precisely and held solidly in that position. I decided to use locking aluminum flexure joints as they were easy and cheap to make. I used some simple math to calculate the length and deflection of the flexure joints and blade.
The whole system needs to be roughed in to about a millimeter in precision. For this I built a simple optical bench with locking slide blocks. The camera was put on its own block so it could be zoomed (when using no lens) or focused (when using a lens) without disturbing the light source/ blade alignment. Once everything is locked down, the flexure joints are used to adjust everything to within about 10 microns.
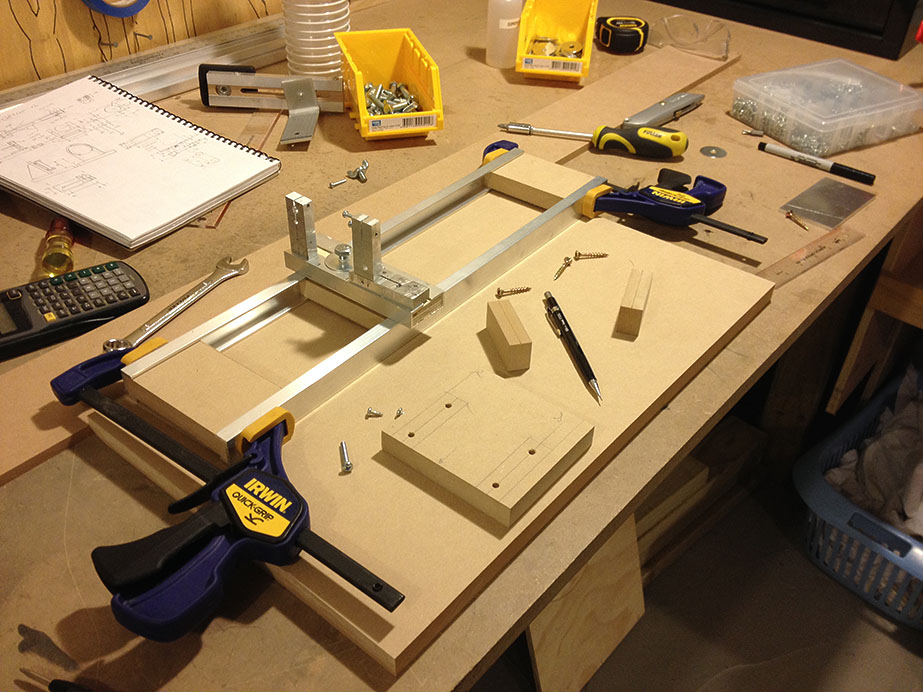


Some things I'd like to improve upon would be to reduce the ringing artifacts, use a brighter light source, a larger mirror, a micrometer x/y stage for the blade, and a better main optical bench. I suspect the wood components I used in the base will cause problems in the future, but so far they have been quite stable.